Page 1 of 3
Horn switch -tricky
Posted: Thu Jul 12, 2012 12:17 pm
by R-man
Yeah the supposedly 'ergonomic switch gear' is not a great fit for many of us. And as I have quite small hands, I tend to roll my L hand up around the grip to operate the horn...its a pain, but I find myself 'covering the horn' more often on approach to many hazards than end up using the brakes...so I've just had to adapt.
Since moving the standadr bars above the top yoke, this has got slightly easier - how is it for those using bar-backs?
Posted: Fri Jul 13, 2012 11:36 am
by Merecat
After 11 years im almost used to it now and can indicate OK, sometines even the right direction!!
I did wonder how difficult it would be to graft a set of H*nda or Suzuki switch gear to the 11S bars?
Mick
Posted: Fri Jul 13, 2012 12:11 pm
by Bikerhoss
As a relative newbie to the 'right for right', 'left for left' switchgear, I've got to come to it's defense here, I'm getting on fine with it, I find it perfectly natural to indicate this way,
If you're struggling to find the horn, can I tentatively suggest that maybe you're using it as a rebuke (maybe trying to find it in a rush) and not as a warning as it's intended

I've only used my horn twice since I got the bike last year, 1st time to warn a driver who wandered into my lane I was there, and the 2nd for the MOT test!
r550s mentiond hand signals, I use then pretty frequently, I find drivers react brilliantly as they see them so rarely, Especially a 'thank you'

Posted: Sun Feb 10, 2013 11:14 pm
by el-nicko
nab 301 wrote:For years I was hitting the l/h ind switch instead of the horn so in the end I transferred the micro switches within the housing from top to bottom and vice versa . There was just enough room without modifying the wiring to do this .
Obviously the external "levers" are marked incorrectly now, but I haven't looked down since...
Hi Nab, could you explain in a bit more detail just how you did it please.
Posted: Mon Feb 11, 2013 8:15 pm
by nab 301
el-nicko wrote:.
Hi Nab, could you explain in a bit more detail just how you did it please.
I went out to take photos and i'd forgotten i'd fitted muffs

, so pics might take a little longer if needed..
There's one or maybe 2 countersunk screws which give access to the switch housing , it'll be fairly self explanatory if you look closely, i can't remember exactly. Once you've gained access you'll see the micro switches which are actuated by the big external levers.
The switches just "sit" in their locations so it's just a matter of reversing their locations top to bottom and bottom switch to top , the only restriction is the wiring , but it was/is possible on mine.
I have probs with the R/h switch gear at the moment but it might be the w/end before i look , I'll probably do photos of the L/H then as well.
Posted: Thu Feb 14, 2013 2:42 pm
by el-nicko
nab 301 wrote:el-nicko wrote:.
Hi Nab, could you explain in a bit more detail just how you did it please.
The switches just "sit" in their locations so it's just a matter of reversing their locations top to bottom and bottom switch to top , the only restriction is the wiring , but it was/is possible on mine.
.
O K Nab. I'm probably being a bit dull

here, but don't I need to physicaly swop the two parts/strands of the wiring loom over. As in; from the left h/bar to the right h/bar for the horn and vicky-vercky for the cancelation switch?

Posted: Thu Feb 14, 2013 3:06 pm
by dave the german
Nick, I think he just swopped the horn and left hand indicator switch around
Posted: Thu Feb 14, 2013 5:10 pm
by el-nicko
dave the german wrote:Nick, I think he just swopped the horn and left hand indicator switch around
Ah yes Dave.

Nabs post makes sense now.

I don't know if I could live with that.

Posted: Thu Feb 14, 2013 7:45 pm
by nab 301
el-nicko wrote:dave the german wrote:Nick, I think he just swopped the horn and left hand indicator switch around
Ah yes Dave.

Nabs post makes sense now.

I don't know if I could live with that.

That's it ! what had you in mind ....?
Posted: Thu Feb 14, 2013 8:47 pm
by el-nicko
nab 301 wrote:el-nicko wrote:dave the german wrote:Nick, I think he just swopped the horn and left hand indicator switch around
Ah yes Dave.

Nabs post makes sense now.

I don't know if I could live with that.

That's it ! what had you in mind ....?
Well I've thought about using the cancelling button as the horn button and the horn button for cancel. My reasoning is that on the left side you've got head/dip-horn-left indicator (esentialy
four switch position options) so on the odd occasion when I
need to find the horn button I'm going, "er...., which one is it now?" Where-as on the right you've only got the one indicator button and ergonomically it makes more sense to have the horn there because you're 'mind' knows instintivly (I hope) not to make that slightly extra stretch when it tells your thumb to hit a button. Thing is, with all the other buttons there's (with the possible exception of the 'dip') time to consider your action. But when you need the horn you usualy need it to be a 'reflex' action. Mind you, I'm left-handed so you would'nt have thort it was a problem in the first place but it is.

Posted: Wed Feb 20, 2013 10:43 pm
by el-nicko
After further consideration I've decided too take nabs route. Only problem is: How do I get the switches apart?

I've removed two screws but they refuse to seperate.

HELP! please.
Posted: Thu Feb 21, 2013 12:01 am
by nab 301
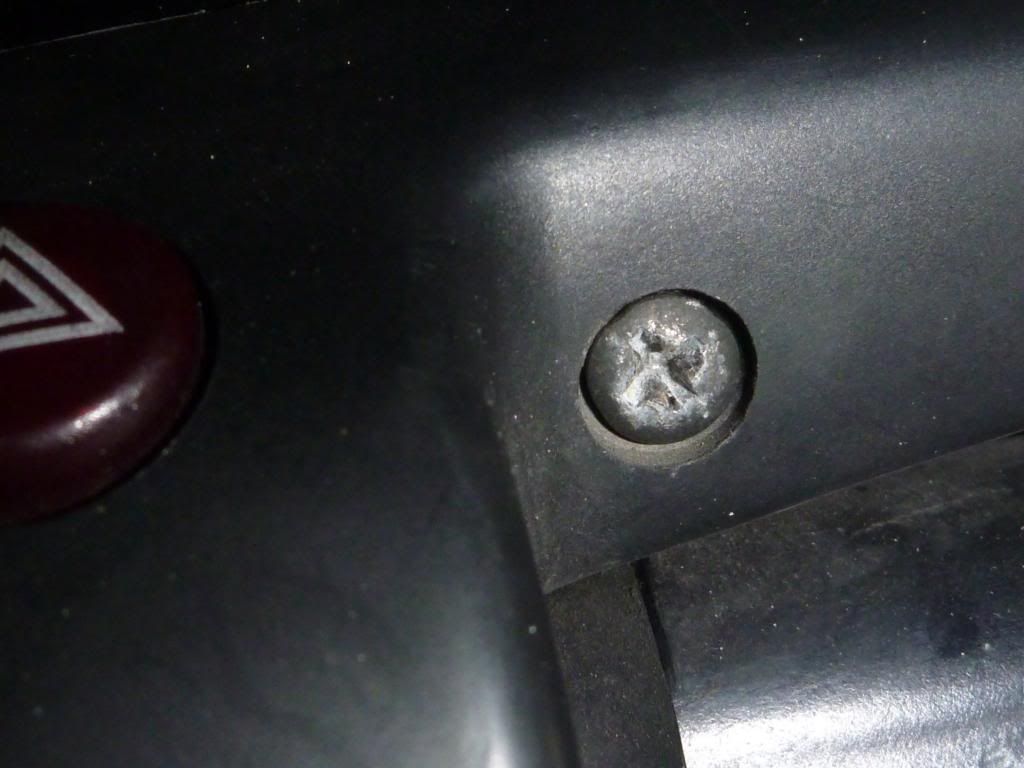
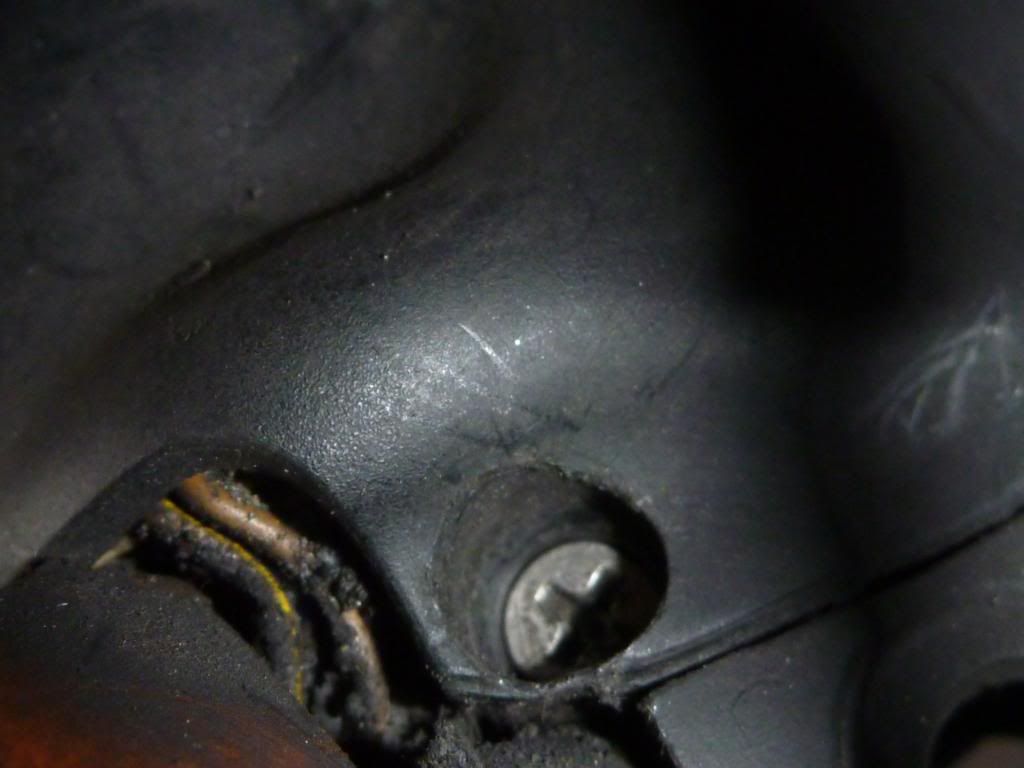
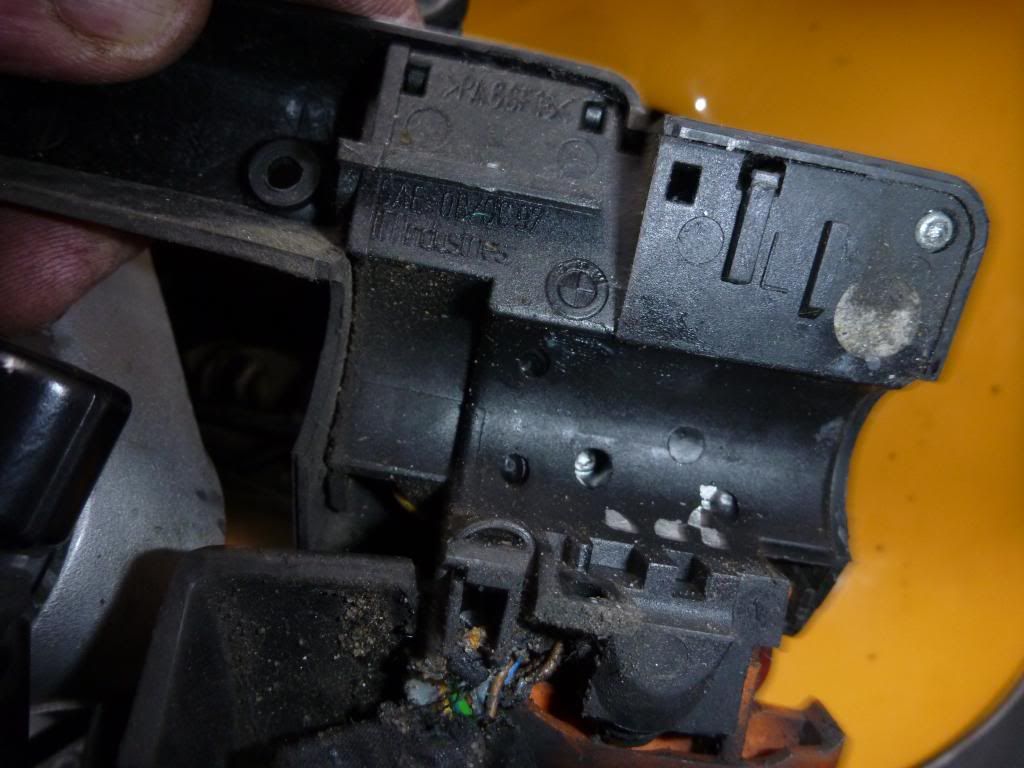
What year is your bike ? I did work on my bike at the weekend but didn't bother with the photos ... There's one countersunk screw underneath and one visible to the rear of the housing , then there's two small torx scews iside the housing when you split it.
Posted: Thu Feb 21, 2013 1:05 am
by el-nicko
'02. Yes, I removed the two c/sunk screws but when it did'nt come apart I didn't force it 'cos I thought I may have missed something. Having thort about this 'mod' Nigel, I like it and may do it on both sides so that the indicator button on the right becomes the 'cancel' button.
Posted: Thu Feb 21, 2013 7:24 pm
by nab 301
Unless the '02 switchgear is different? I may have time tomorrow to do pics...
Posted: Sun Feb 24, 2013 10:31 pm
by nab 301
I had a look at my switch gear today just to refresh my memory

. I removed the screws and it pulled apart with a bit of fiddling , lower section first.
I found it more diffficult than I remember , and I wasted lots of time getting it all back together , I hope your ears were burning!
Upper screw
Lower screw
2small torx screws to remove inside the assy.
Remove the levers
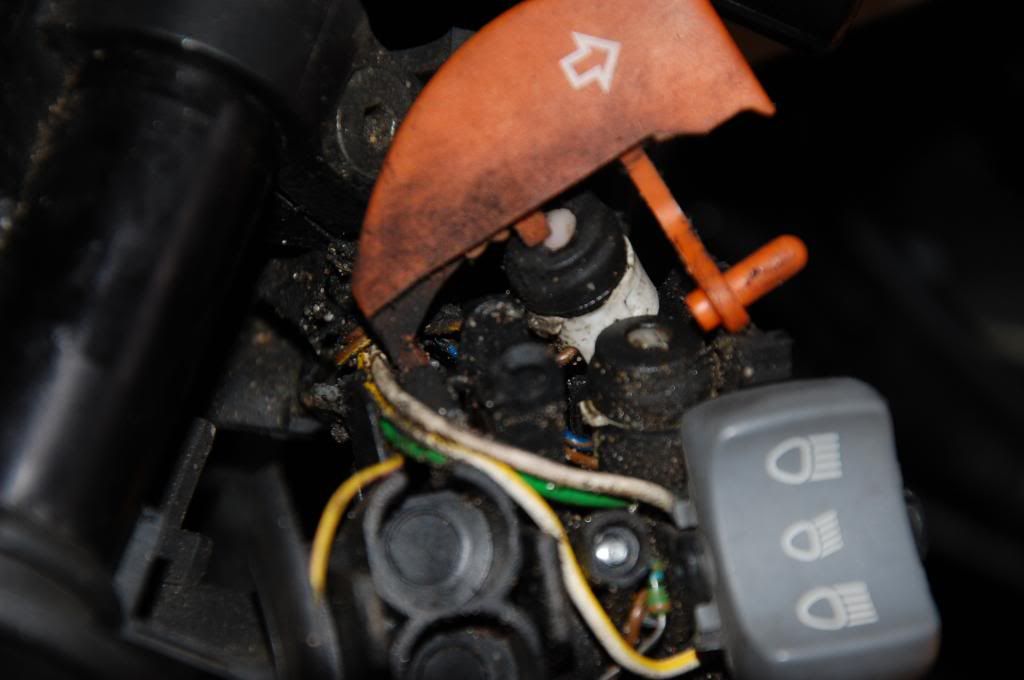
Swop the switches top to bottom
